
This tutorial was submitted by OpenHornet Contributor Randy “Exprezzo” Henrion.
The Bleed Air Knob Mechanism (OH5A5A1-200) requires a 4 position, 90 degree throw with continous rotation. Unfortunately, continous rotation switch meeting this spec was obscenely expensive…so we just modified a cheaper version! The switch is a A12405RNZQ switch. Be careful, don’t use too much force, and take your time. The small components inside are under spring force and will launch into the ether if you aren’t careful.
Tools & Materials Required
- A12405RNZQ Switch
- Small flat head screwdriver or other small prying tool
- Small needle nose pliers
- Tweezers
- Flush Cutters
- Needle File
Step 1: Housing Disassembly
While keeping the stem under tension and secured, open the housing by GENTLY prying away the 4x clips on the bottom of the rotary switch. Too much force applied to the plastic clip will cause it to break. Instead, gently push a clip towards the edge (~25% of the way) and then move on to the next one; keep doing this until all of the pins have clearance and then separate the housing.

RotarySwitch1

RotarySwitch2

RotarySwitch3
Step 2: Stem Removal

RotarySwitch4
Cup the housing with the palm of your hand and remove tension on the stem by slowly pushing it through the housing.
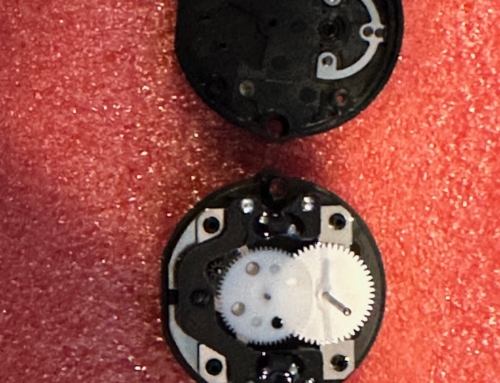
The rotary switch is comprised of 5 main components:
a. Bottom Housing
b. Top Housing
c. Stem
d. Spring
e. 2x Ball bearings
Step 3: Rotation Stop Removal
Remove the two plastic tabs, one located on the stem and one located inside the top housing, by whatever means suitable.

RotarySwitch5

RotarySwitch6

RotarySwitch7
Step 4: Switch Reassembly

RotarySwitch8

RotarySwitch9

RotarySwitch10

RotarySwitch11

RotarySwitch12

RotarySwitch13
- Insert the spring back into the stem and then slide the stem back through the top housing.
- Rotate the stem so that the spring is parallel with the rounded cutout on the upper housing
- Insert a ball bearing into the spring OPPOSITE the side of the cutout.
- Push the stem all the way into the housing to secure the backside ball bearing and insert the 2nd ball bearing into the rounded cutaway portion.
- While maintaining downward pressure on the stem, use the backside of a pen, marker or other object, and push the ball bearing into the spring. Once it clears the cutout, the stem will collapse and secure the bearings in place
- The stem should now sit flush. Place the bottom housing back on and ensure the clips are secured under their own tension. Then test it!
Step 3: Testing
- Spin the switch, ensuring all detents are felt, and smooth travel of the switch around the entire range of movement.
- Verify continuity of each position with a multimeter or similar.
Congratulations. You have now successfully converted your switch to a 4 position, 90° throw, continuous rotation switch!

Leave a Reply